After publishing the interactive image project, you can upload it to your hosting / server by following flows below.
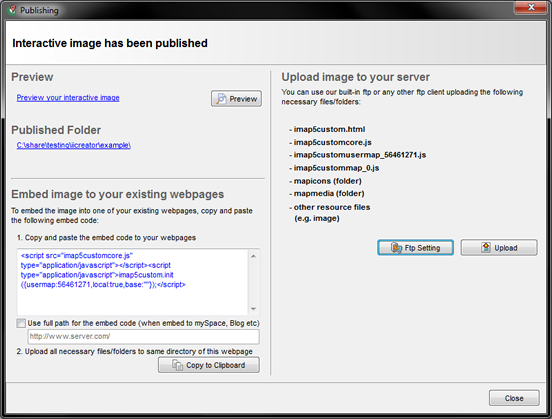
- A Publishing panel will be popped up
- Edit settings in the popped up panel

| Items | Descriptions |
|---|---|
| Preview | Preview interactive image in browser |
| Published Folder | Open the project folder |
| Embed map to your existing webpage | 1. Copy and paste embed code to a server or web hosting, or, click Copy to Clipboard button to copy the code 2. Edit the web page or website with a web development application (e.g. Dreamweaver) or text editor. Paste the embed code to a proper place ( after tags<body> but before </body> ) 3. Save the document, and upload it to the server. * Document and map files have to be placed in the same folder. (A sample result link) |
| Upload map to your server | - Click Ftp Setting button - Input Ftp login information - Click Upload |
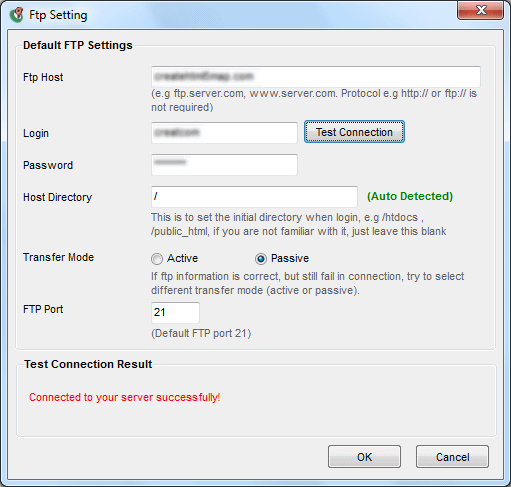
Ftp Settings - Upload Image to Server or Web Hosting
You have to edit Ftp Settings before uploading the image to server.
- Click Ftp Settings after publishing the image
- Edit settings in panel
- Click Test Connection button, and the result would be shown
- Click OK
- Click Upload button in Publishing panel
- A possible URL of the image will be displayed after finishing the upload
*Depends on different hosting providers.

Upload an interactive image project to a web server
[ User Guide Home ]
